Pages

Saturday, April 21, 2012

Recession Proofing Your NY Wedding: Part II

Pin It Go local.  Except for a few things, like certain household products, I was never really too brand conscious.  So if you're not too particular about the name of the supplier, using local suppliers will save you a lot on transportation and delivery fees.  Plus, you don't have to worry about the deliveries getting stuck in traffic.  Because the Church was in the Bronx, we decided to make it a sort of an excursion for most of our guests who haven't been to the area.  Luckily for us, the real Little Italy of New York--as my friends and I would argue--is just a few blocks from Fordham.  So we made sure we featured as much of it as we could.

The Venue: Michaelangelo's Restaurant

Some general notes on how we kept budget with the venue. Having the reception at a restaurant saved us a lot on rentals:  chairs, tables, plates, and so on.  In addition, ask if there's a discount when you pay cash.  Several establishments would probably have it.  We also had the reception at 3:30 in the afternoon which we indicated in the invitation as a "cocktail reception".  By having a mid-afternoon reception, we didn't have to spend on a cocktail hour and a meal.  The guests were also surprised that there was so much food because they thought there would just be servers going around with little cocktail food.  So we stayed in budget without the guests feeling like we were scrimping on anything.

Now, a warning: I cannot stop raving about this place! Although I'd been to this place a couple of times before, booking our reception with them was a bit of a risk because we would be the first wedding they would do.  On the up side, because they wanted us to have a great experience, they were just so accommodating.

Let me start my rave with the restaurant itself.  Some guests were telling us that as they walked into the restaurant, they were all wondering why we were having our reception at a pizza place. But as they walked through the narrow hallway to the back, they were all surprised at how beautiful the venue was.  The hallway opens to a charming courtyard with stonework floors, a waterfall bar, rustic brick walls, and tropical plants.  You would never have guessed you were a block from the chaos that is Fordham Road.  But despite the courtyard feel, the place was covered and air conditioned. Again, as with the Church, the restaurant itself had a charm of its own that we did not spend a dime decorating it. They did offer to provide balloons, but we respectfully declined.  Oh, and our guests (me and my hubby included) appreciated the couches! They also had a patio where the guests could smoke without missing too much of the party.

All photos by KimThao Photography

My maid of honor gifted us these souvenirs. She got the cookies from a warehouse store, tied the cello wrap with ribbons and added a charming little detail of dried lavender sprigs.  The guests appreciated the cookies (they were good!). They also served as part of the table decor, having been set there before the guests arrived.
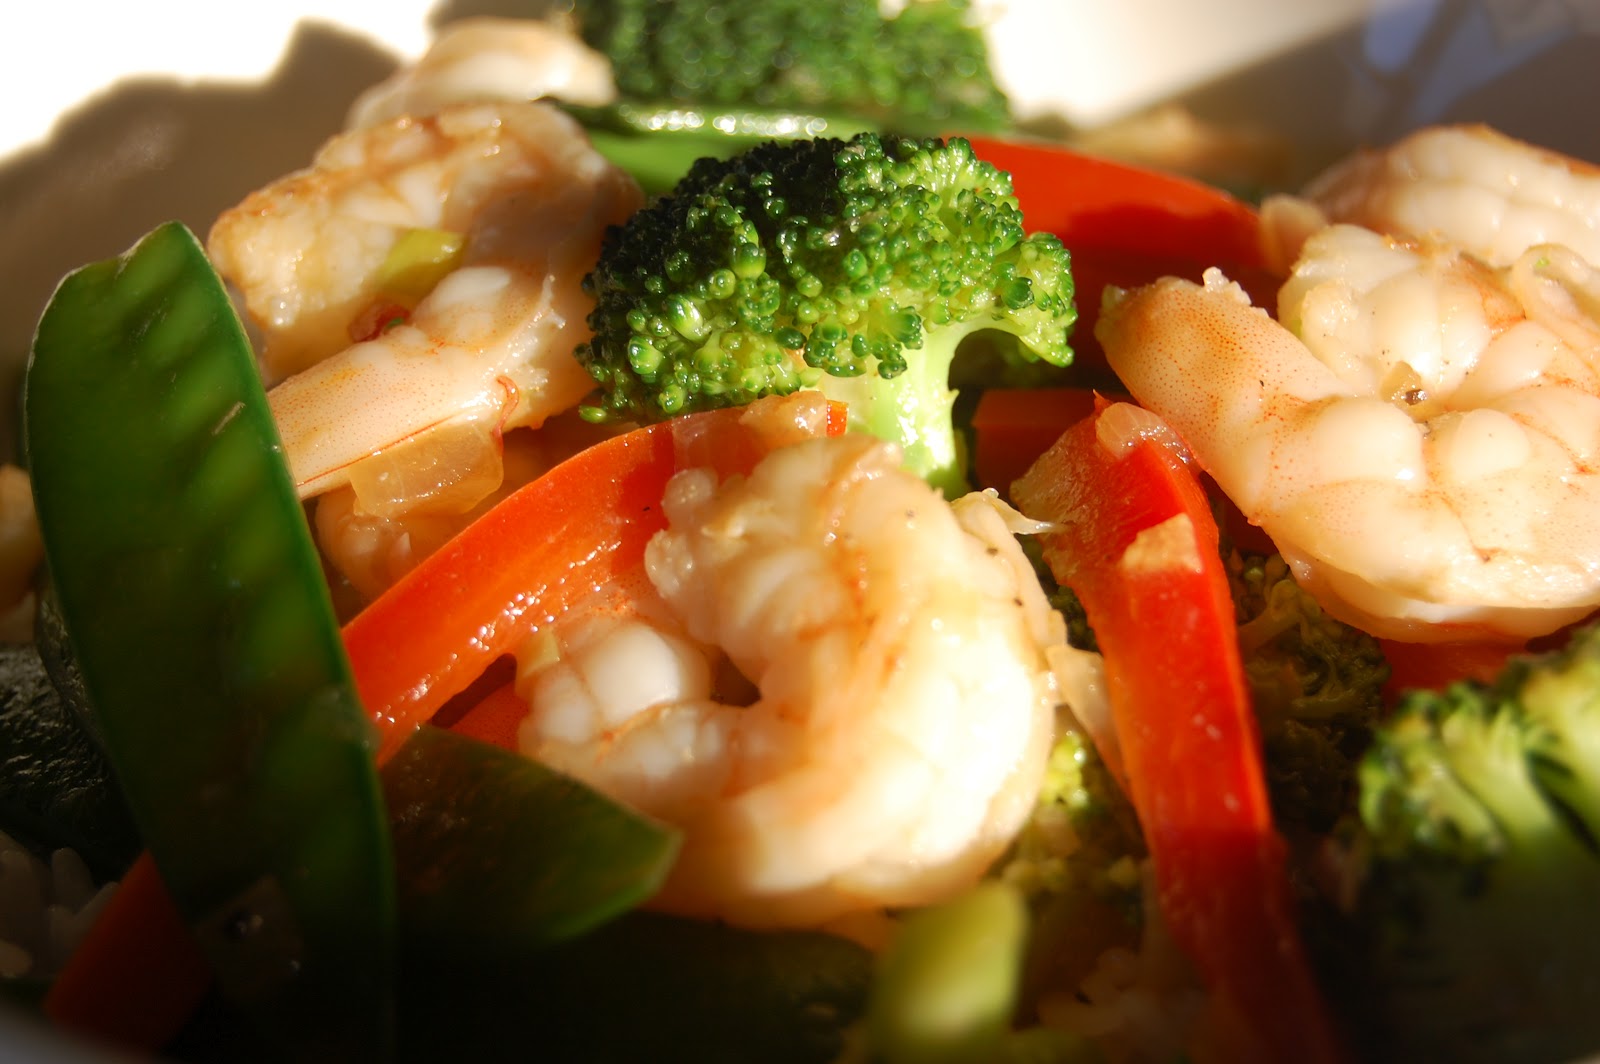
Bruschetta and bottles of wine (all included in the price per head!) were laid on the tables even before the guests arrived.  The guests did not have to wait for something to drink and munch on when they got to the restaurant.  And these were more practical centerpieces than flowers.

We were very comfy!  Note that those flowers were the altar decor from Church.
Now it would just have been wrong to be on Arthur Avenue and not serve Italian food.  And Michaelangelo's definitely delivered the comfort we expect from it.  The buffet menu included three pastas, salmon, meatballs, and the list goes on and on. And the menu already included Italian cookies and pastries (locally sourced by the restaurant, of course) and sodas, coffee and tea! Out of respect for my guests, I will not post photos of the heaping plates of food they held as they walked away from the buffet table.  And based on the clean plates, I'd say they enjoyed it. 


We had a bottom shelf open bar and a cash bar for all other drinks.  All that food, including the drinks, came at a price that was waaaay below $100--unheard of in NYC!  We were definitely lucky to find such a restaurant that was eager to please new clients in the Bronx, but I'm sure there are plenty of hidden gems like Michaelangelo's in the city. 

The Cake:  De Lillo's Pastry Shop

Because dessert was included in our buffet, we thought we didn't really need the cake to be too big.  Also, I wanted a simple and fully edible cake.  Red velvet cake was our favorite at the time, so the flavor was paramount.  De Lillo's, in my opinion, had the best red velvet cake among the Arthur Avenue bakeshops.  Is it obvious I've tried quite a number of them?


We had 3 cake flavors:  red velvet, chocolate mousse, and cannoli cake (we had to have something Italian there).  I was told they were all delicious.
 I just searched for a photo online that they could base the decor on because I didn't want too much embellishment.  Then, I got a Wilton cake stand from Amazon for $25 and my brother helped me spruce it up.  It is now sitting in my kitchen cabinet waiting for a pastry party.  Point is, I can use it again. All in all, we spent much less than $200 for our cake.

The Flowers: Small Flower Shop in Front of Mt. Carmel Church on 187th St.

I contemplated on getting fresh flowers and doing my own arrangements, but then I chose to pick my battles.  I didn't really want to worry about them wilting or not opening up before the wedding.  So I decided to get them from a teeny flower shop in the area.  I feel terrible that I cannot even remember their name. They did do a pretty good job. I told them I wanted to support local suppliers in the area so they agreed to waive the delivery charge (they delivered the flowers to Fordham which was only a few blocks away from them anyway). We spent only about $400 on flowers because we only needed bouquets and the altar arrangements.


Saved a lot on flowers by having such a small wedding party and having the men wear Barong Tagalogs (did not need flowers for them).  The florist also did the two tall flower arrangements for the altar.  Just like the cake stand, the vases are at home being re-used.  Also, choose flowers that are in season.  Roses are always classically beautiful and pretty much available year round.
.


To be continued... will tell you about my photographers.  Apart from Michaelangelo's, I feel we got the best value from Kim Thao (and her hubby Jimmy).

Thursday, April 19, 2012

Asian Shrimp and Veggies

Pin It

This is another quick and easy dish that's great with rice, pasta, or Asian noodles (I like the thin egg noodles).  Also a less greasy alternative to the standard Chinese takeout.

garlic
onion
minced ginger
red bell peppers
snap peas
broccoli florets
(any other vegetable you may want to add like carrots or spinach)
fresh or frozen shrimp, peeled and deveined
Kikkoman lite soy sauce
sesame oil (hot sesame oil optional)

Sautee garlic, onion and ginger until garlic is golden (not burnt). Add in broccoli first, then snap peas and red bell peppers. I like to cook the veggies very slightly so that they are still slightly crunchy.  Add the shrimp and cook slightly.  Create a well in the middle of the veggies and pour just enough soy sauce into the well to cover the veggies.  Toss this around until flavors are all mixed together. Don't take too long so that the veggies and the shrimp don't overcook. When this is done sprinkle the dish with a dash of sesame oil. Sesame oil can be overpowering, so be very careful not too add too much. If hot sesame oil is too spicy for you, you can add red pepper flakes instead for a little kick.

This dish can be served over rice or noodles (pasta or Asian noodles).  If serving with noodles, I like to toss the noodles in once the shrimp and veggies are done.  I also use slightly more soy sauce and sesame oil to make sure the noodles or pasta are coated with the sauce.

Wednesday, April 18, 2012

Roast Chicken: Thanks, Thomas Keller!

Pin It At the risk of this blog being called 101 Ways to Make Chicken, I will write about a foolproof roast chicken a la Thomas Keller.  This was another favorite segment from the Basics of Cooking episode of No Reservations.  Thomas Keller shows us how to make the perfect simple roast chicken that can be taken into any direction by any type of sauce, gravy or side dish. I made this on Sunday night with roasted asparagus and potatoes.  I prepared the asparagus by simply tossing in olive oil and balsamic vinegar, seasoned with salt and pepper.  On Tuesday, I heated up the leftovers and served it with Mae Ploy sweet chilli sauce.  For my sides, we had rice and it's still roasted asparagus but this time I tossed it in soy sauce and sesame oil, seasoned with freshly ground black pepper and red pepper flakes.  So with a few twists and turns, the same chicken went from West to East.

Some of the helpful things that I learned from the video is the importance of the room temperature chicken.  I ignored this once and took a much longer time for the chicken to cook. That would be the last time I ignore a real chef's instructions!  Also, removing the wishbone really does make it so much easier to cut off the entire half of the chicken from the carcass.  It took me three tries to be able to remove the entire collar bone without breaking it.  But I still cannot truss a bird if my life depended on it.  I've trussed several birds in the past few years, but it's never the same every time. I just can't get it right!

The crispy skin crackles!
For my version, I sprinkled dried rosemary on top and inside the chicken. Because my chicken was over 5 pounds, I had to roast the chicken in a 425-degree oven for about an hour and a half. 

Gravy

Spray the bottom with cooking spray before putting the chicken onto the roaster.  Place the giblets at the bottom of the roaster, leveling them to make sure they don't touch the bottom of the rack where the chicken will rest.  This will prevent them from burning and sticking to the roasting rack. Roast chicken and giblets.

When chicken is done, remove roasting rack and giblets from the roasting pan.  Place the roasting pan on stove top.  If there are not enough drippings, deglaze the roasting pan with either white wine or low sodium chicken stock.  Add butter (or butter substitute), a little bit of flour to thicken.  Season with salt and pepper  as needed.  I use relatively more pepper than salt for the gravy. Delicious and simple.

Friday, April 13, 2012

Super Duper Easy Blueberry Cobbler

Pin It I found this recipe for blueberry cobbler that takes literally 10 minutes to prepare.  Really a quick dessert especially for a weeknight.  I can imagine this would be super yummy with ripe Philippine mangoes too.  Maybe I'll try it with the mangoes we get here.  I used frozen blueberries for this experiment.

As usual, I made some revisions. One is replacing the milk with fat free half and half.  Then I cut the sugar to about only half a cup for the batter.  It was plenty sweet even with less sugar.  In addition, I sprinkled a little bit of dark brown sugar and ground cinnamon on top of the blueberries after I put them in the batter. 


 Perhaps because I used fat free half and half, my cobbler was done in 40 minutes.  I served it warm with vanilla soy ice cream on top. The crust was crunchy and chewy at the same time, and the blueberries gooey.  With the cold ice cream, this dessert delivers a variety of textures and temperatures that will satisfy your weeknight dessert cravings.  And because there were no eggs in the batter, I imagine this is a lower cholesterol dessert.  My hubby suggested it would actually be also good for breakfast with yogurt on top and I agree.  Being forced to watch the Food Network does seem to be getting to him.

Thursday, April 12, 2012

Red Velvet Cupcakes With A Tad Less Guilt

Pin It To follow my attempt at a Southern-inspired baked chicken, my attempt at another Southern classic.  The ubiquitous red velvet cupcake.  My recipe of choice was Ina Garten's because I looooved her coconut cupcakes.  However, some revisions to the red velvet cupcakes in an attempt to reduce the guilt on these treats.  Even if these are lower fat cupcakes, they're still a lot better than some of those store-bought (for $2 each!) nuclear red cupcakes that are not velvety at all.


I ran out of red food color, so I just had pinkish brown cupcakes!

But they really weren't too red at all when I originally tried this recipe.


I replaced half the butter with unsweetened applesauce in the cupcake batter.  The original recipe called for half a cup of unsalted butter, but I only used a quarter cup.  So I replaced the rest with a quarter cup of applesauce.  My husband certainly didn't notice any difference in texture and didn't know I did anything different with it until I told him.  It was just as moist.  Also, I just used Hershey's Special Dark cocoa powder and the taste was just fine.  Another important change was the baking time.  My cupcakes were done between 15 and 17 minutes.  Ina calls for 25 to 30 minutes, which would totally dry out the cupcakes.  I've made these cupcakes before following the original recipe and I did have to cut the baking time down so I know using the applesauce didn't affect the baking time.  I'm still puzzled why the original recipe called for such a long baking time.  Another note, because the applesauce has natural sweetness, I suppose the sugar can be cut by a quarter cup.

For the frosting, I pretty much followed the recipe to the letter, but I only used about a cup of unsifted confectioner's sugar (Just because it was easier for me to measure, and then sift).  I'm quite sure this would still be much less than what she used.  I like to taste the cheese in my cream cheese frosting and not have it too sweet.

About using applesauce to replace fat in baking, I've also tried this on my Go-To Loaf Recipe and it was just fine.  I've also replaced the oil in brownie mix with not much change in texture or moisture.  I do taste a slight hint of the apple flavor in the brownies, but it's not too big a deal.  However, I can imagine that applesauce may not be appropriate for cookies as it would be too soupy for cookie batter.

Baked "Fried" Chicken

Pin It Who doesn't love Southern style fried chicken?  I certainly do... but since we're trying to avoid all types of frying in the house, I've figured out how to make a lighter alternative.  Of course, it won't be the same as fried chicken, but it's not bad either.


"Fried" Chicken

For two servings:

1 chicken breast (sliced butterfly style into 2 pieces)
buttermilk
chili powder
granulated garlic
onion powder
cumin
paprika
cayenne pepper
flour
1 egg beaten
panko bread crumbs

Marinate the chicken breast pieces in the buttermilk for at least two hours.  The enzymes in the buttermilk tenderizes the chicken breast and will keep it moist (Thanks to all those episodes of Diners, Drive-Ins, and Dives I've seen).

When the chicken is done marinating, pre-heat oven to 375-degrees F.  Mix all the spices, salt and pepper in a bowl.  Let the buttermilk drip off the chicken.  Season the chicken breast with the spice mix.  Dredge the seasoned chicken in flour, then egg, then the breadcrumbs.  Bake the chicken for 20 minutes on a cooling rack to make sure that both sides of the breast are crunchy.

Gravy

I got the original recipe from another blog--Cooking by the Seat of Our Pants--with a few revisions.  Instead of milk, I used fat free half and half only because we don't have milk in the house.  And instead of butter, I used I Can't Believe It's Not Butter.  I also used a couple of additional ingredients:

low sodium chicken stock
onions

I just eyeballed the amounts because I didn't need as much as his original recipe.  Sautee the onions and add the chicken stock and half and half when the onions are translucent.  In a small bowl, dissolve the flour with a little bit of water. I read somewhere you need one teaspoon for every cup of liquid you'll be using.  Add the flour mixture into the saucepan.  Season with salt and a lot of freshly ground black pepper.  Strain the gravy to remove the onions.
 I served the chicken with mashed purple potatoes and roasted green beans. A note, though, while I loved the color of the purple potatoes, I didn't really love them mashed because they were too starchy.  Should've gone for the Yukon gold.  For the green beans, I just tossed them in salt, pepper, and a little bit of olive oil.  Bake for 10 minutes in the 375-degree oven.

Friday, April 6, 2012

Shrimp Pasta

Pin It Because my Quick Friday-of-Lent Dinner post got the most page views and it is Good Friday, I thought it would be appropriate to post about another favorite dish in this house.  Although a tad late for those in the Philippines, this dish is good for an easy weeknight meal.  The recipe uses my homemade jarred tomato sauce.  But this can definitely be made with a simple olive oil and garlic sauce similar to the salmon pasta dish.


1/2 lb. uncooked, peeled and deveined shrimp
about 1 1/2 cups of my tomato sauce
about 3 cloves of garlic, minced
my standard Italian herbs
salt and pepper
1/4 lb. pasta (half of an 8 oz package)

Start boiling the pasta, I like to use thin linguini.  The sauce should be ready as soon as the pasta is al dente.

While pasta is cooking, sautee garlic in olive oil.  Add the shrimp and season with salt, pepper, and herbs.  Take the shrimp out before it is fully cooked. This will be very, very quick so make sure to fish out the shrimp before it is fully opaque.  You don't want to overcook the shrimp when you put it back in the sauce later. Pour the sauce into the oil where shrimp was sauteed.  This allows the shrimp flavor to be infused into the sauce.  Once the pasta is almost ready, put the shrimp back into the sauce to finish cooking.  Once the pasta is al dente, put the pasta into the sauce to finish cooking in the sauce.  Toss and serve.  Makes two servings.

Money saving tips

I like to buy peeled frozen shrimp from my warehouse club so that I can always conveniently prepare this dish.  The two-pound bag of the colossal shrimp is about $20.  But I found that when I'm not serving it as cocktail shrimp, I can get the same two pounds for $14 for the extra large shrimp.  That's a lot of savings for the same amount of shrimp in weight.  You just use more pieces of shrimp for each unit of weight you need .

Wednesday, April 4, 2012

Lower Sodium, Low Fat Burrito

Pin It

This is seriously the most requested dish in our household.  We love Mexican food, but the yumminess has some unwanted health consequences.  So instead of getting Mexican food out, I've decided to find out how I can desalinate one of our favorite items on the menu--the burrito. So this is a much lighter version of what you might get at a restaurant.  Now, it does take some effort because of all the components but most of them can be made ahead. And a note, the salsa definitely makes it.

Below, "spice" means a mix of the following (I use dried spices.): cumin, chili powder, paprika, cayenne pepper (optional... this is very spicy).  Also, although there are boxed Spanish rice that are easy to make, I found they had insane amounts of sodium. So I decided to make my own.

For the "Spanish" rice
spice mix above (Eyeball the amounts here based on which flavors you want. My general rule, if I can still smell the rice while it's cooking, then I didn't put enough spices.)
onions (1 small one)
tomato (1 will do)
1 1/2 cups uncooked rice
1 1/2 cups chicken stock (I use low sodium... no need for too much salt with all the spices)

In a pot, sautee onions in oil, then add tomatoes when onions are slightly translucent. Add the uncooked rice and season with the spice mix. Sautee a bit until rice is covered with the oil, spice mix, etc. Add chicken stock.  Bring to a boil then lower the heat. Stir occasionally to prevent rice from being sticky. If it's drying up but not yet cooked, add a bit more chicken stock.  You would rather have the rice a bit dry (but cooked!) than gummy. This will take around 20 minutes. Set aside.

For the salsa
2-3 tomatoes
1 onion (I like to use white.)
1 large slightly unripe mango (You want it to have a bit of a crispness, but slightly tangy and sweet)
fresh cilantro (depends how much u want)
salt and pepper
1/2 lemon (or lime or dayap, but lemon preferred)

Dice tomatoes, onions, and mangoes. Put all in a bowl.  Season salt and pepper.  Chiffonade fresh cilantro and add to salsa.  Finally, add the juice of the lemon. Toss all together (This is actually better if you let it sit for a few hours to allow flavors to blend well, so you can definitely make ahead.).

For the chicken
2 chicken breasts (Each sliced butterfly style for thinner cutlets.)
spice mix above
salt and pepper

Rub spice mix and salt and pepper onto the chicken.  Either bake this at 375-degrees F for 20 minutes or grill or cook in a bit of oil in pan (not really fry).  Let it rest about 5 minutes before slicing into strips so juices won't run out.

Optional substitute for the chicken
ground meat (turkey, beef or pork)
spice mix
garlic
onion
salt and pepper

Sautee garlic and onion.  Add and brown the meat.  Season with spice mix, salt, and pepper.


Building the Burrito
I use two large flour tortillas for each burrito. Overlap them like a Venn diagram. Spread sour cream, then the rice, chicken, salsa, and grated cheese (Mexican blend or cheddar).  You can add hot sauce for additional kick.  Wrap the burrito by closing the sides first, then bring the end closest to you towards the other end.

Put in the oven for about 10 mins at 350-deg. This crisps up the tortilla and melts the cheese.