Pages

Showing posts with label chicken. Show all posts

Friday, July 6, 2012

The Most Delicious Chicken Dish in the World...

Pin It ... As some have described, according to Mark Bittman in How to Cook Everything.  Arguably, the ubiquitous adobo may very well be the national dish of the Philippines.  The dish is undoubtedly a hand me down from the 300 something years of Spanish colonization, but we have taken it as our own.  For years, I have been trying to perfect this and I've finally come up with my own version that I LOVE!  As my husband so eloquently put it, "This is good... stuff (let's just say the actual word is acceptable only on cable TV)".  Hey, this is New York.

For the unfamiliar, there are only two basic ingredients to make this dish:  garlic and vinegar.  The list of proteins or vegetables that will be cooked in it is pretty much endless.  Based on my observation, pork and chicken are the most popular.  In fact, the combination of the two has been aptly nicknamed CPA (chicken-pork adobo).  One of my favorites is our nanny's pork and my grandmother's squid adobo made with its ink.  Each region in the country will have its own version of the dish.  I grew up with meat adobo that is also braised in soy sauce.  I use Filipino soy sauce (Marca Pina or Silver Swan) because it just isn't the same without it.  Filipino soy sauce is probably somewhere between the darker Chinese sauce like La Choy and the lighter Japanese Kikkoman.  I would probably prefer Kikkoman if I couldn't get the Filipino soy sauce.

Given that there are so few ingredients, it is important to get those few steps right.  For instance, while you would often hear that the garlic should NOT be browned in Western cooking, the flavor of the adobo will not be the same if the garlic is not browned.  We Filipinos love our toasted garlic. Also, traditionally, a meat adobo is braised in the liquid, fried to give it some crunch, then placed back into the sauce. How can you not love this dish???  However, again, in an effort to achieve the same flavors but make it a little bit healthier, I have changed the steps around using some of the techniques I've seen on all those Food Network shows.


So, here's my version of the best chicken dish I've ever made:


4 chicken thighs (Got them on sale for 99 cents a pound!)
5 cloves of garlic, minced (It is a lot, but that's how we roll.)
soy sauce
white vinegar
water
fresh black pepper
one bay leaf (optional--I do opt out of this, but some people like it.)

So instead of frying as the last step, I rendered out the fat from the chicken skin first before braising. In an oven-safe sautee pan, heat a little bit of canola oil over medium high, just enough so the chicken will not stick to the pan (You don't need a lot as the thigh has a lot of its own fat).  When the oil is hot enough, put the chicken, skin side down, into the oil.  Turn the chicken over once the skin is golden brown.  Remove the chicken from the pan once the other side is slightly browned and set aside.  (Although the next step is heart-breaking for me, it is necessary to make the dish slightly healthier).  Spoon out and discard the rendered fat from the pan, leaving just enough to sautee the garlic in.

Pre-heat the oven to 350 degrees Farenheit.  In the same pan, brown the garlic (make sure it's brown, not burnt).  Add one part vinegar to two parts soy sauce once garlic is browned (I just use a cooking spoon to measure these. The liquid should not cover the chicken skin that you just crisped up.).  Let the mixture boil without stirring (very important as the vinegar won't cook--I don't know the scientific explanation but it seems to be true!).  Reduce to a simmer and taste.  If it's too salty, which it will likely be, add some water (about 2 parts for me). Add the chicken back, skin side up.  Season with a lot of black pepper.  Simmer, uncovered, for about 15 minutes. Add more water if the liquid starts to dry out.  Put the pan in the oven for about 20 minutes to finish cooking.  The chicken is done if juices run clear when poked with a knife.  Serve over rice and enjoy!

Note:  This version actually also has slightly reduced sodium.  The original recipe from our nanny required 3 parts soy sauce to 1 part vinegar.  But because of the simmering and finishing in the oven in this case, the soy sauce becomes so concentrated that you don't need as much.  So don't worry if you initially add too much water and you seem to have diluted the flavor.  Also, this dish keeps so well and is also better as a leftover.  We Filipinos love to have it for breakfast over garlic fried rice and egg.

Monday, May 7, 2012

Post-Cinco de Mayo Celebration: Pulled Chicken Tacos

Pin It With my last (hopefully) CFA exam looming, I have been unable to find the time away from studying.  But in an effort to keep my hordes of readers (and by hordes, I mean, three) interested, I'm writing about my new favorite Mexican dish to make at home. I've made the barbecue pulled chicken from a recipe that I found on allrecipes.com (I can't seem to find it now, though).  I thought I'd put a Mexican twist by adding my standard spices. It was delicious!  And I made enough to do chicken and cheese enchiladas (along with some leftover turkey chili) tonight.  But that will be for another post.


 For the Chicken:

4 chicken breasts (can be frozen)
1/2 c molasses based barbecue sauce (I use Sweet Baby Ray's)
1/2 c Italian salad dressing
water
ground cumin
chili powder
onion powder
granulated garlic
ground paprika
ground cayenne (this is very spicy, so use according to your taste)
black pepper

Line the chicken breasts on the bottom of a slow cooker. Add barbecue sauce and Italian dressing.  To make sure there's sufficient liquid covering up to half the chicken breasts, add water.  Add seasonings. Basically, cover the exposed part of the chicken breast with the seasonings.  Use thongs to turn the chicken over to make sure that all sides get in contact with the sauce and seasoning.  Cover and cook on low for at least 3 hours if chicken is thawed and around 6 hours if frozen. Pull or shred the chicken and mix so that it absorbs the juices.  The chicken will be so tender, you will not have a hard time shredding it.  This, of course, can also be done on very low heat on the stove top as long as you're planning on staying inside the house for the duration of the cook time.

Taco:

soft corn tortilla (Love the flavor of this and I discovered they don't have as much sodium as the flour tortilla.  The ones I get actually had no sodium!)
greens (can be shredded cabbage or lettuce.  I used baby spinach just because it was all I had)
salsa (in this case, I used my ever dependable mango salsa.  Recipe in the burrito post.)
sour cream
shredded cheese (I used Mexican blend, but use any cheese you want.)

Warm the tortillas in a 300-degree oven for about 3 minutes on each side.  I like to layer my taco as such:  sour cream, greens, chicken, salsa, then cheese. We also like to add some Frank's Red Hot sauce for an extra punch. Serve and enjoy!

Wednesday, April 18, 2012

Roast Chicken: Thanks, Thomas Keller!

Pin It At the risk of this blog being called 101 Ways to Make Chicken, I will write about a foolproof roast chicken a la Thomas Keller.  This was another favorite segment from the Basics of Cooking episode of No Reservations.  Thomas Keller shows us how to make the perfect simple roast chicken that can be taken into any direction by any type of sauce, gravy or side dish. I made this on Sunday night with roasted asparagus and potatoes.  I prepared the asparagus by simply tossing in olive oil and balsamic vinegar, seasoned with salt and pepper.  On Tuesday, I heated up the leftovers and served it with Mae Ploy sweet chilli sauce.  For my sides, we had rice and it's still roasted asparagus but this time I tossed it in soy sauce and sesame oil, seasoned with freshly ground black pepper and red pepper flakes.  So with a few twists and turns, the same chicken went from West to East.

Some of the helpful things that I learned from the video is the importance of the room temperature chicken.  I ignored this once and took a much longer time for the chicken to cook. That would be the last time I ignore a real chef's instructions!  Also, removing the wishbone really does make it so much easier to cut off the entire half of the chicken from the carcass.  It took me three tries to be able to remove the entire collar bone without breaking it.  But I still cannot truss a bird if my life depended on it.  I've trussed several birds in the past few years, but it's never the same every time. I just can't get it right!

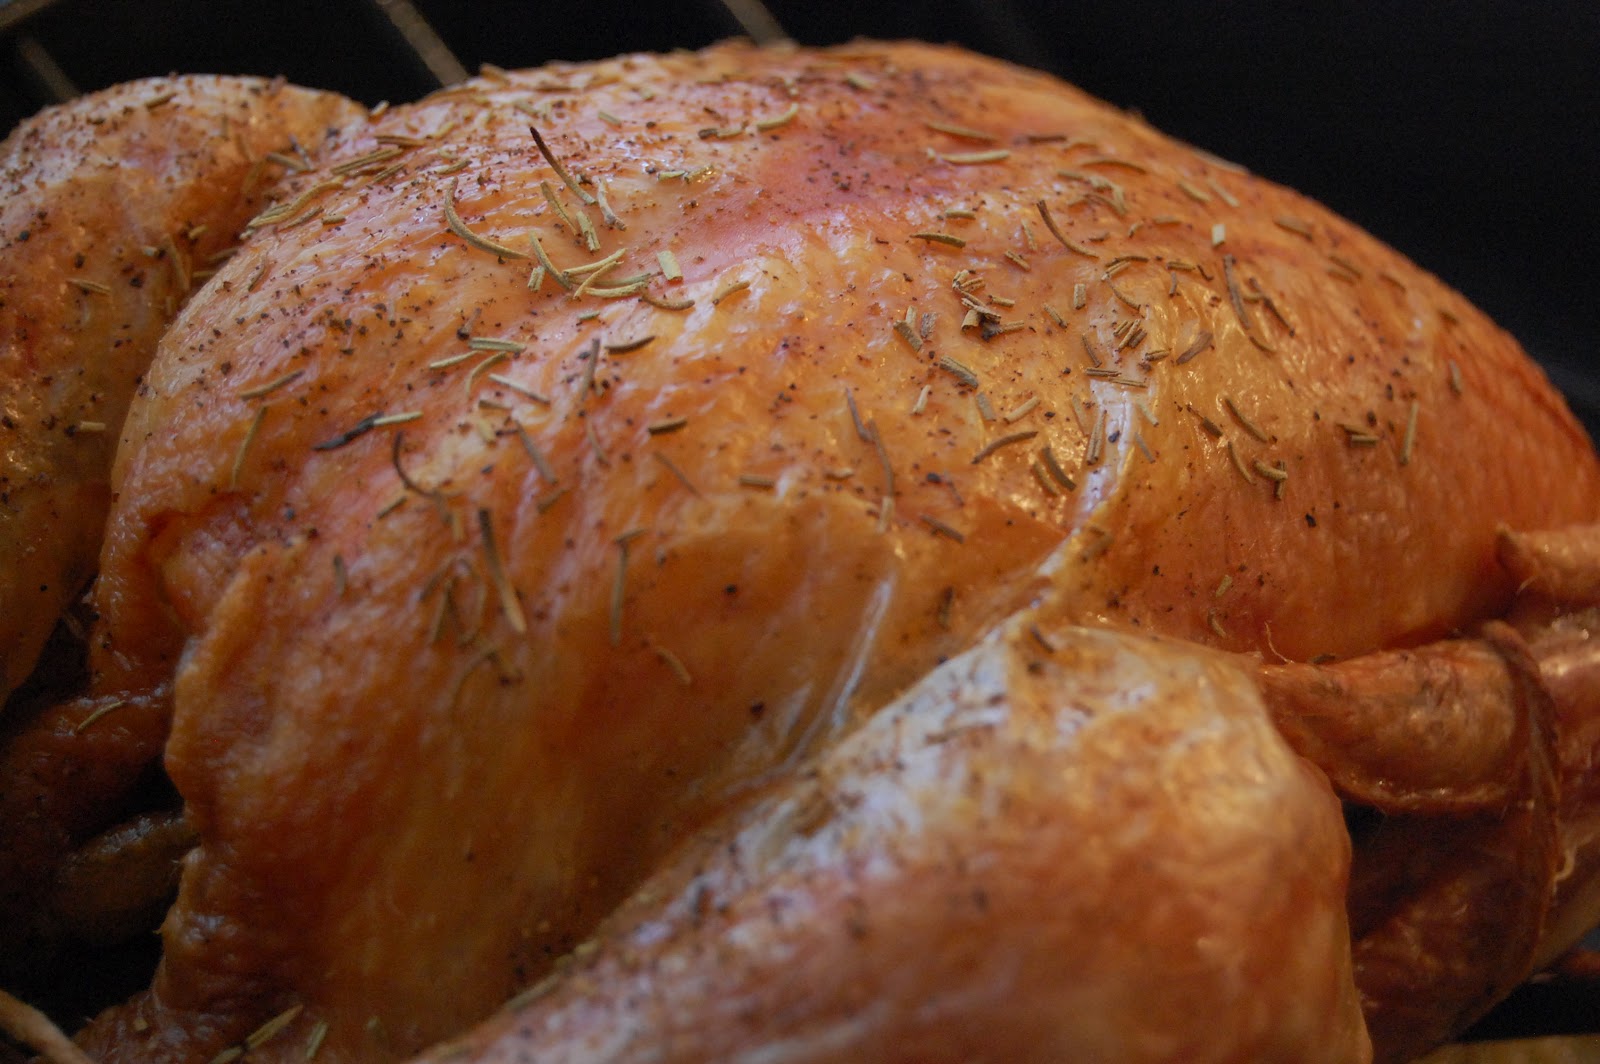
The crispy skin crackles!
For my version, I sprinkled dried rosemary on top and inside the chicken. Because my chicken was over 5 pounds, I had to roast the chicken in a 425-degree oven for about an hour and a half. 

Gravy

Spray the bottom with cooking spray before putting the chicken onto the roaster.  Place the giblets at the bottom of the roaster, leveling them to make sure they don't touch the bottom of the rack where the chicken will rest.  This will prevent them from burning and sticking to the roasting rack. Roast chicken and giblets.

When chicken is done, remove roasting rack and giblets from the roasting pan.  Place the roasting pan on stove top.  If there are not enough drippings, deglaze the roasting pan with either white wine or low sodium chicken stock.  Add butter (or butter substitute), a little bit of flour to thicken.  Season with salt and pepper  as needed.  I use relatively more pepper than salt for the gravy. Delicious and simple.

Thursday, April 12, 2012

Baked "Fried" Chicken

Pin It Who doesn't love Southern style fried chicken?  I certainly do... but since we're trying to avoid all types of frying in the house, I've figured out how to make a lighter alternative.  Of course, it won't be the same as fried chicken, but it's not bad either.


"Fried" Chicken

For two servings:

1 chicken breast (sliced butterfly style into 2 pieces)
buttermilk
chili powder
granulated garlic
onion powder
cumin
paprika
cayenne pepper
flour
1 egg beaten
panko bread crumbs

Marinate the chicken breast pieces in the buttermilk for at least two hours.  The enzymes in the buttermilk tenderizes the chicken breast and will keep it moist (Thanks to all those episodes of Diners, Drive-Ins, and Dives I've seen).

When the chicken is done marinating, pre-heat oven to 375-degrees F.  Mix all the spices, salt and pepper in a bowl.  Let the buttermilk drip off the chicken.  Season the chicken breast with the spice mix.  Dredge the seasoned chicken in flour, then egg, then the breadcrumbs.  Bake the chicken for 20 minutes on a cooling rack to make sure that both sides of the breast are crunchy.

Gravy

I got the original recipe from another blog--Cooking by the Seat of Our Pants--with a few revisions.  Instead of milk, I used fat free half and half only because we don't have milk in the house.  And instead of butter, I used I Can't Believe It's Not Butter.  I also used a couple of additional ingredients:

low sodium chicken stock
onions

I just eyeballed the amounts because I didn't need as much as his original recipe.  Sautee the onions and add the chicken stock and half and half when the onions are translucent.  In a small bowl, dissolve the flour with a little bit of water. I read somewhere you need one teaspoon for every cup of liquid you'll be using.  Add the flour mixture into the saucepan.  Season with salt and a lot of freshly ground black pepper.  Strain the gravy to remove the onions.
 I served the chicken with mashed purple potatoes and roasted green beans. A note, though, while I loved the color of the purple potatoes, I didn't really love them mashed because they were too starchy.  Should've gone for the Yukon gold.  For the green beans, I just tossed them in salt, pepper, and a little bit of olive oil.  Bake for 10 minutes in the 375-degree oven.

Friday, March 30, 2012

Not Quite a Chicken Parmigiana

Pin It Easy and healthy... that's the mantra in this household as we have certain health issues to be dealt with.  This is a lighter version of the Italian classic that makes use of my stored sauce.


For two servings:

1 chicken breast, sliced into halves (sliced butterfly style to make thinner cutlets)
the standard Italian dry herbs
1 egg, beaten
flour
Panko bread crumbs (these are lighter and crunchier than regular breadcrumbs, a regular in my pantry)
tomato sauce
fat-free grated mozzarella (of course, this is cheaper) or fresh mozzarella slices

Preheat oven at 375-degrees F. Season the chicken breasts with salt, pepper, and herbs. Rub them in, so the flavor stays even after breading the chicken.  Dredge chicken in flour, then dip into the egg, and finally into the Panko. Breading does not need to be thick, just enough to cover the chicken.  It's best to use a cookie cooling rack to bake these so the breading does not stick or gets soggy on the tray; so you get both sides of the chicken breast crunchy.  Otherwise, you can use a greased pan.  Put in the oven for about 20 mins.

Take out of the oven and pour tomato sauce over each chicken breast, just enough to cover the top.  Sprinkle the cheese on top of the sauce, the amount according to how you like it.  Put back into the oven just until the cheese melts. That's it!

I like to pair this with pasta, of course--another use for the tomato sauce.  While this is definitely not the same as the fried version of the dish, the Panko breading makes for a delightfully light crunch. This is one of our favorite meals in the household.  Quite a bit more than just a tolerable low-fat, low-sodium dish.