Pages

Showing posts with label cooking. Show all posts

Thursday, April 19, 2012

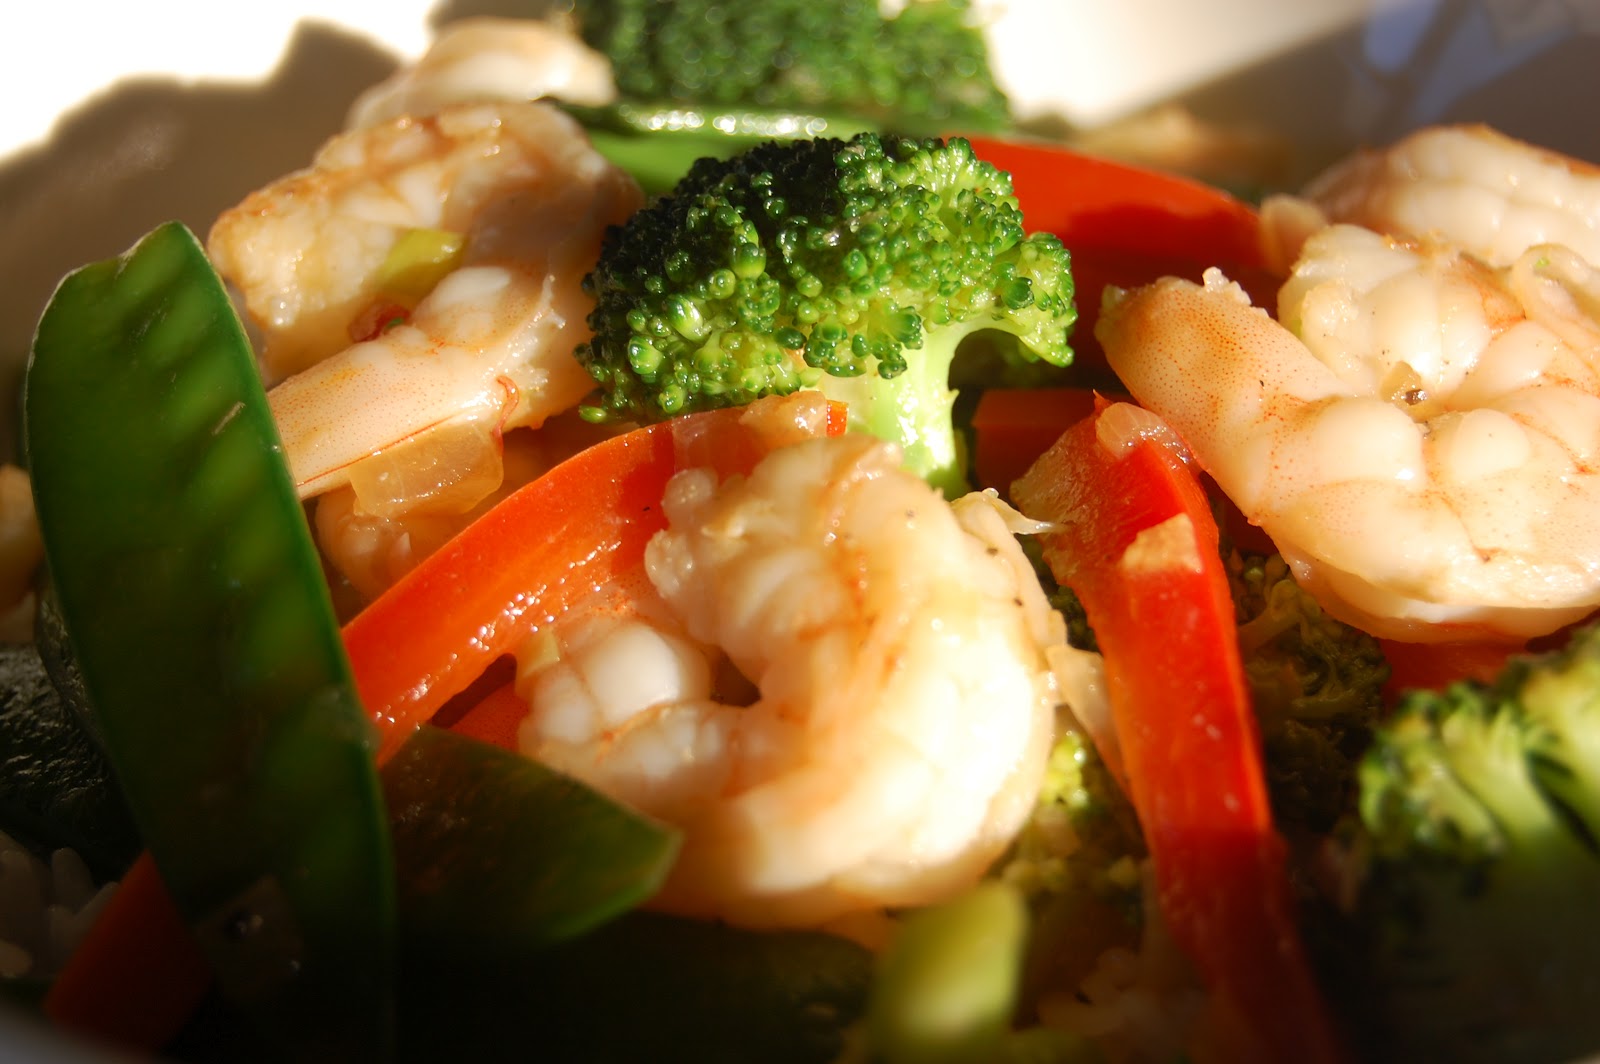
Asian Shrimp and Veggies

Pin It

This is another quick and easy dish that's great with rice, pasta, or Asian noodles (I like the thin egg noodles).  Also a less greasy alternative to the standard Chinese takeout.

garlic
onion
minced ginger
red bell peppers
snap peas
broccoli florets
(any other vegetable you may want to add like carrots or spinach)
fresh or frozen shrimp, peeled and deveined
Kikkoman lite soy sauce
sesame oil (hot sesame oil optional)

Sautee garlic, onion and ginger until garlic is golden (not burnt). Add in broccoli first, then snap peas and red bell peppers. I like to cook the veggies very slightly so that they are still slightly crunchy.  Add the shrimp and cook slightly.  Create a well in the middle of the veggies and pour just enough soy sauce into the well to cover the veggies.  Toss this around until flavors are all mixed together. Don't take too long so that the veggies and the shrimp don't overcook. When this is done sprinkle the dish with a dash of sesame oil. Sesame oil can be overpowering, so be very careful not too add too much. If hot sesame oil is too spicy for you, you can add red pepper flakes instead for a little kick.

This dish can be served over rice or noodles (pasta or Asian noodles).  If serving with noodles, I like to toss the noodles in once the shrimp and veggies are done.  I also use slightly more soy sauce and sesame oil to make sure the noodles or pasta are coated with the sauce.

Wednesday, April 18, 2012

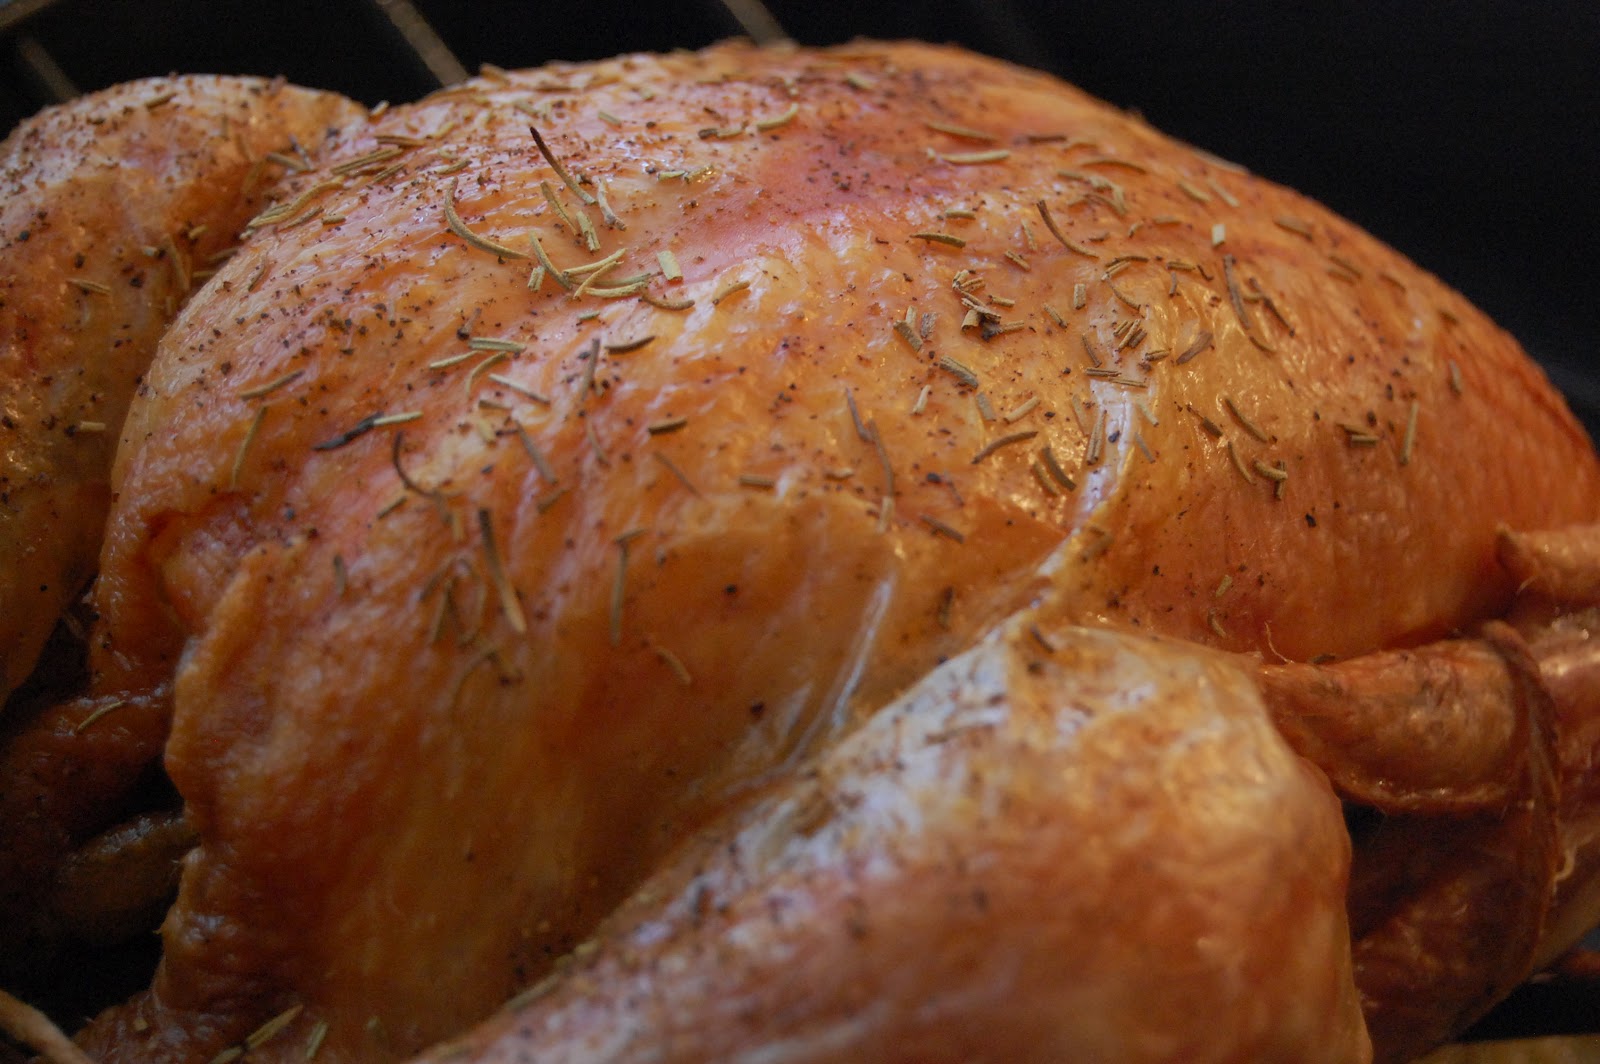
Roast Chicken: Thanks, Thomas Keller!

Pin It At the risk of this blog being called 101 Ways to Make Chicken, I will write about a foolproof roast chicken a la Thomas Keller.  This was another favorite segment from the Basics of Cooking episode of No Reservations.  Thomas Keller shows us how to make the perfect simple roast chicken that can be taken into any direction by any type of sauce, gravy or side dish. I made this on Sunday night with roasted asparagus and potatoes.  I prepared the asparagus by simply tossing in olive oil and balsamic vinegar, seasoned with salt and pepper.  On Tuesday, I heated up the leftovers and served it with Mae Ploy sweet chilli sauce.  For my sides, we had rice and it's still roasted asparagus but this time I tossed it in soy sauce and sesame oil, seasoned with freshly ground black pepper and red pepper flakes.  So with a few twists and turns, the same chicken went from West to East.

Some of the helpful things that I learned from the video is the importance of the room temperature chicken.  I ignored this once and took a much longer time for the chicken to cook. That would be the last time I ignore a real chef's instructions!  Also, removing the wishbone really does make it so much easier to cut off the entire half of the chicken from the carcass.  It took me three tries to be able to remove the entire collar bone without breaking it.  But I still cannot truss a bird if my life depended on it.  I've trussed several birds in the past few years, but it's never the same every time. I just can't get it right!

The crispy skin crackles!
For my version, I sprinkled dried rosemary on top and inside the chicken. Because my chicken was over 5 pounds, I had to roast the chicken in a 425-degree oven for about an hour and a half. 

Gravy

Spray the bottom with cooking spray before putting the chicken onto the roaster.  Place the giblets at the bottom of the roaster, leveling them to make sure they don't touch the bottom of the rack where the chicken will rest.  This will prevent them from burning and sticking to the roasting rack. Roast chicken and giblets.

When chicken is done, remove roasting rack and giblets from the roasting pan.  Place the roasting pan on stove top.  If there are not enough drippings, deglaze the roasting pan with either white wine or low sodium chicken stock.  Add butter (or butter substitute), a little bit of flour to thicken.  Season with salt and pepper  as needed.  I use relatively more pepper than salt for the gravy. Delicious and simple.

Thursday, April 12, 2012

Baked "Fried" Chicken

Pin It Who doesn't love Southern style fried chicken?  I certainly do... but since we're trying to avoid all types of frying in the house, I've figured out how to make a lighter alternative.  Of course, it won't be the same as fried chicken, but it's not bad either.


"Fried" Chicken

For two servings:

1 chicken breast (sliced butterfly style into 2 pieces)
buttermilk
chili powder
granulated garlic
onion powder
cumin
paprika
cayenne pepper
flour
1 egg beaten
panko bread crumbs

Marinate the chicken breast pieces in the buttermilk for at least two hours.  The enzymes in the buttermilk tenderizes the chicken breast and will keep it moist (Thanks to all those episodes of Diners, Drive-Ins, and Dives I've seen).

When the chicken is done marinating, pre-heat oven to 375-degrees F.  Mix all the spices, salt and pepper in a bowl.  Let the buttermilk drip off the chicken.  Season the chicken breast with the spice mix.  Dredge the seasoned chicken in flour, then egg, then the breadcrumbs.  Bake the chicken for 20 minutes on a cooling rack to make sure that both sides of the breast are crunchy.

Gravy

I got the original recipe from another blog--Cooking by the Seat of Our Pants--with a few revisions.  Instead of milk, I used fat free half and half only because we don't have milk in the house.  And instead of butter, I used I Can't Believe It's Not Butter.  I also used a couple of additional ingredients:

low sodium chicken stock
onions

I just eyeballed the amounts because I didn't need as much as his original recipe.  Sautee the onions and add the chicken stock and half and half when the onions are translucent.  In a small bowl, dissolve the flour with a little bit of water. I read somewhere you need one teaspoon for every cup of liquid you'll be using.  Add the flour mixture into the saucepan.  Season with salt and a lot of freshly ground black pepper.  Strain the gravy to remove the onions.
 I served the chicken with mashed purple potatoes and roasted green beans. A note, though, while I loved the color of the purple potatoes, I didn't really love them mashed because they were too starchy.  Should've gone for the Yukon gold.  For the green beans, I just tossed them in salt, pepper, and a little bit of olive oil.  Bake for 10 minutes in the 375-degree oven.

Friday, March 30, 2012

Not Quite a Chicken Parmigiana

Pin It Easy and healthy... that's the mantra in this household as we have certain health issues to be dealt with.  This is a lighter version of the Italian classic that makes use of my stored sauce.


For two servings:

1 chicken breast, sliced into halves (sliced butterfly style to make thinner cutlets)
the standard Italian dry herbs
1 egg, beaten
flour
Panko bread crumbs (these are lighter and crunchier than regular breadcrumbs, a regular in my pantry)
tomato sauce
fat-free grated mozzarella (of course, this is cheaper) or fresh mozzarella slices

Preheat oven at 375-degrees F. Season the chicken breasts with salt, pepper, and herbs. Rub them in, so the flavor stays even after breading the chicken.  Dredge chicken in flour, then dip into the egg, and finally into the Panko. Breading does not need to be thick, just enough to cover the chicken.  It's best to use a cookie cooling rack to bake these so the breading does not stick or gets soggy on the tray; so you get both sides of the chicken breast crunchy.  Otherwise, you can use a greased pan.  Put in the oven for about 20 mins.

Take out of the oven and pour tomato sauce over each chicken breast, just enough to cover the top.  Sprinkle the cheese on top of the sauce, the amount according to how you like it.  Put back into the oven just until the cheese melts. That's it!

I like to pair this with pasta, of course--another use for the tomato sauce.  While this is definitely not the same as the fried version of the dish, the Panko breading makes for a delightfully light crunch. This is one of our favorite meals in the household.  Quite a bit more than just a tolerable low-fat, low-sodium dish.

My Version of Scott Conant's Sauce

Pin It Inspired by the No Reservations episode on the basics of cooking, I finally attempted an easier version of Scott Conant's sauce.  Check out the episode here:  Scott Conant in No Reservations (his part comes in the end and you have to go to another video for the second part).

He blanches and peels fresh tomatoes for his sauce.  I used canned whole peeled tomatoes... just keeping it real, I'm not that passionate. Besides, the big cans of Red Pack (my brand of choice, as recommended by former Roomie) go on sale for a dollar each, probably every three weeks or so.  And because I have the dried Italian herbs, I also use that instead of fresh basil.  What I like about this recipe is the fact that I don't have to sautee anything.


So here's my easy version of his sauce.

3 large cans whole peeled tomatoes in thick sauce
about 1 cup extra virgin olive oil
about 1 1/2 heads of garlic, peeled
fresh basil or dried Italian herbs

Pour in tomatoes into a big pot.  Season with salt and pepper.  Scott pours in some oil with his tomatoes, but I skip this since I use tomatoes in sauce.  This further cuts the fat that I use in the sauce.  Simmer for about 45 minutes.  Crush tomatoes with a potato masher.  I just let this continue to simmer while the olive oil infusion is being prepared.

In a separate sauce pan, pour the olive oil. Add the garlic and herbs.  I like to pound the garlic a little bit to make sure that the flavors are further infused into the oil.  Let the flavors infuse the oil over low heat for about 20 minutes.  The aroma of garlic and herbs in the kitchen will tell you that it's working.  Strain oil into the crushed tomatoes and let them simmer together for about 15 minutes.  If you're using the dry herbs, check for taste, add more if needed.

This is a very subtle sauce that tastes pretty authentic and will cost you much less than the jarred sauces from the store.  And it really doesn't take that much effort, especially if you use the canned tomatoes.  So now, I always have this sauce in my fridge for those nights when I run out of ideas.  I'll follow this up with some recipes that I make with the sauce.

Friday, March 23, 2012

Quick Friday-of-Lent Dinner

Pin It It's that time of the year again when I have to figure out meatless meals on Friday.  And it turns out, I had only one serving of salmon left in the freezer.  I found that the best way to make a meal for two people when there's not enough salmon for an entree was to make pasta. I've been making this go-to dish for a while now and used to make it with sun dried tomatoes.  But the husband doesn't like them... nor is he too thrilled about salmon either.  But this dish, he actually likes.  So I used grape tomatoes just because it was the only thing I had in my pantry. What's even better about this dish is that it probably takes, seriously, 30 minutes to prep and cook (not including boiling the water, of course!).  If you're actually taking this recipe seriously, I don't have measurements because everything depends on your preference.


finely chopped garlic
olive oil
dried Italian herbs (I get the Badia Italian Seasoning where the dried herbs are already mixed)
fresh tomatoes
cut pasta like farfalle or rotini

Poach the salmon in slightly boiling water until medium rare, because this will finish cooking in the dressing later on. I really don't know how long for, I just check by flaking the fattest part of the fish.  Take it out of the water, then flake with a fork.

While the pasta is cooking, sautee garlic and tomatoes in enough olive oil to coat the pasta.  I sautee them until the tomatoes have cooked enough that they color the oil.  Season with salt, pepper and the herbs.  When pasta is almost done, add the salmon to the tomato-olive oil dressing.  Re-season with salt, pepper and herbs.  Drain the cooked pasta and add to the pan where the dressing is cooking.  Don't turn off the flame because you want the pasta to finish cooking in the dressing.  This will let the pasta absorb the flavors of the dressing.  Toss the pasta until fully coated with the oil.  If there's not enough oil for your pasta, just drizzle some more olive oil to finish.  Adjust seasoning to taste.

Top with fresh basil if you're concerned about the presentation.  After all, salmon and tomatoes are in the same color family.

A note on using the dried herbs
 
I use the pre-mixed Italian seasoning for two reasons: it's a lot cheaper than buying these dried herbs separately or buying fresh and my husband's Italian--I use this flavor A LOT!  I don't claim that this is gourmet, but I claim that this is real.  We're not all Ina Garten or Giada de Laurentis who can walk out to their garden to pick their fresh herbs.